

The error
Did you face the below error messages?

No Citrix Workspace Cloud Connector was found, either on the site or for the required zone. At least one CWC Connector is needed for the site. Any configured zones containing hypervisors require at least one Connector per zone. New or recently moved Connectors may need a few minutes to be correctly recognized.
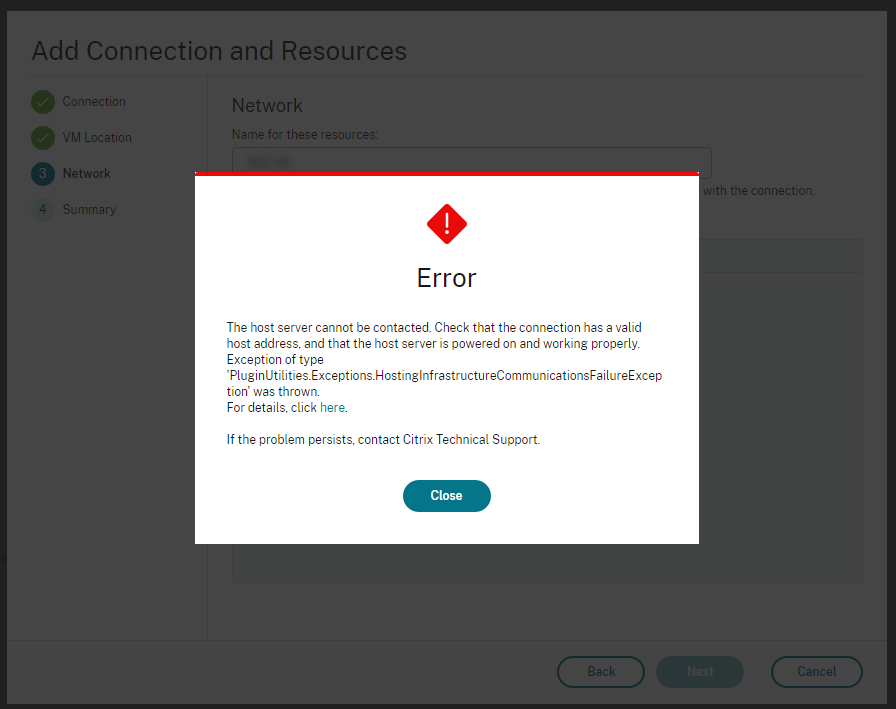
The host server cannot be contacted. Check that the connection has a valid host address, and that the host server is powered on and working properly.
When I was trying to add a new hosting connection with another AWS account to my Citrix Cloud environment, I fell into 2 problems:
- I couldn’t add a new Hosting connection on the Citrix Cloud Web Studio because the Cloud Connectors have a proxy set
- I wanted to reuse an existing zone with existing Cloud Connectors
Preparation
Disclaimer: It is obvious that you should not run actions from someone you do not know and who does not know your environment. So please, try in a safe environment first.
So, how to create a new AWS hosting connection on Citrix Cloud reusing an existing zone and its Cloud Connectors with a proxy?
⚠️ First of all, be sure you are running the latest PowerShell SDK, aka the CitrixPoshSdk. Follow this link for further details.
So, how to create a new AWS hosting connection on Citrix Cloud reusing an existing zone and its Cloud Connectors with a proxy? Let’s go.
Now, authenticate yourself (using Get-XDAuthentication) and then check for your existing zone UID by running this command:
get-configzone | select name,uid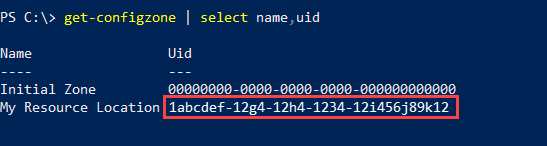
Copy the Uid of the desired zone you want your new hosting connection to use, and use the Cloud Connectors from.
Now, let’s hard set this Uid into the script taken from the Citrix article https://support.citrix.com/article/CTX248735. Be careful, the script in Citrix’s article has a bad formatting and the “YELLOW” highlighted parts are missing.
Here is what I used. The copy-paste to your text/code editor should be fine from my tests.
Script
param(
[string] $server = "your proxy IP",
[string] $port = "port used",
[string] $awsEndPoint = "https://ec2.your-region.amazonaws.com",
[string] $hypConnName = "YourDesiredConnectionName",
[string] $apiKey = "YourAWSuserAPIkey",
[string] $secretKey = "YourAWSuserSecretKey",
[string] $resourceLocation = "NewResourceLocationName")
Add-PSSnapin Citrix.*
$hypType = "AWS"
<# Setup the metadata entry for the proxy host and port that you are intending to use.
#>
$options = "ProxyHost= $server ,ProxyPort= $port"
$secureSecretKey = ConvertTo-SecureString -String $secretKey -AsPlainText -Force
<# Getting our resource location identifier so this connection knows where to go for xdhyp provider
Note the $zoneUid value below hard set from the previous get-configzone command #>
$zoneUid = "1abcdef-12g4-12h4-1234-12i456j89k12"
$hypHc = New-Item -Path xdhyp:\Connections `
-Name $hypConnName `
-HypervisorAddress $awsEndPoint `
-UserName $apiKey `
-SecurePassword $secureSecretKey `
-ConnectionType $hypType `
-Metadata @{ "Citrix_MachineManagement_Options" = $options } `
-CustomProperties "" `
-Persist `
-ZoneUid $zoneUid
$bhc = New-BrokerHypervisorConnection -HypHypervisorConnectionUid
$hypHc.HypervisorConnectionUid
<# End of script #>
Make sure you have a look at my post on all the links to blogs and KBs collection I regularly use.
